



# Securing Self-Hosted Kubernetes with Identity Provider Integration
## Why Static Certificates Are a Growing Liability
When you spin up a managed Kubernetes service in the cloud, identity and access management is handled for you. The provider ships with IAM or single sign-on integration baked in from the start. Self-hosted clusters tell a different story. By default, they rely on static client certificates or long-lived tokens — credentials issued once, used indefinitely, and rarely if ever reviewed.
The problem compounds over time. A certificate issued to an engineer who has since left the organization, shifted roles, or lost access to their device continues to grant cluster access exactly as it did on day one. Nothing in the authentication pipeline checks whether that person still warrants entry. Revoking it requires hunting down every file copy on every machine — a task that, in practice, never gets fully completed. Once more than two people need differentiated access levels, managing credentials per person and per file becomes a role in itself.
This is a day-zero problem that most on-prem cluster checklists skip. It shouldn’t be.
—
## The Core Idea: Let an Identity Provider Own Access
Instead of distributing certificate files, place an identity provider — Keycloak or any OpenID Connect (OIDC)-compliant provider — in front of the cluster. When access follows an account and its group membership rather than a static file, management changes fundamentally. Need to grant access? Add the person to a group. Need to revoke it? Remove them from the group. No file distribution, no certificate rotation, no chasing copies across laptops.
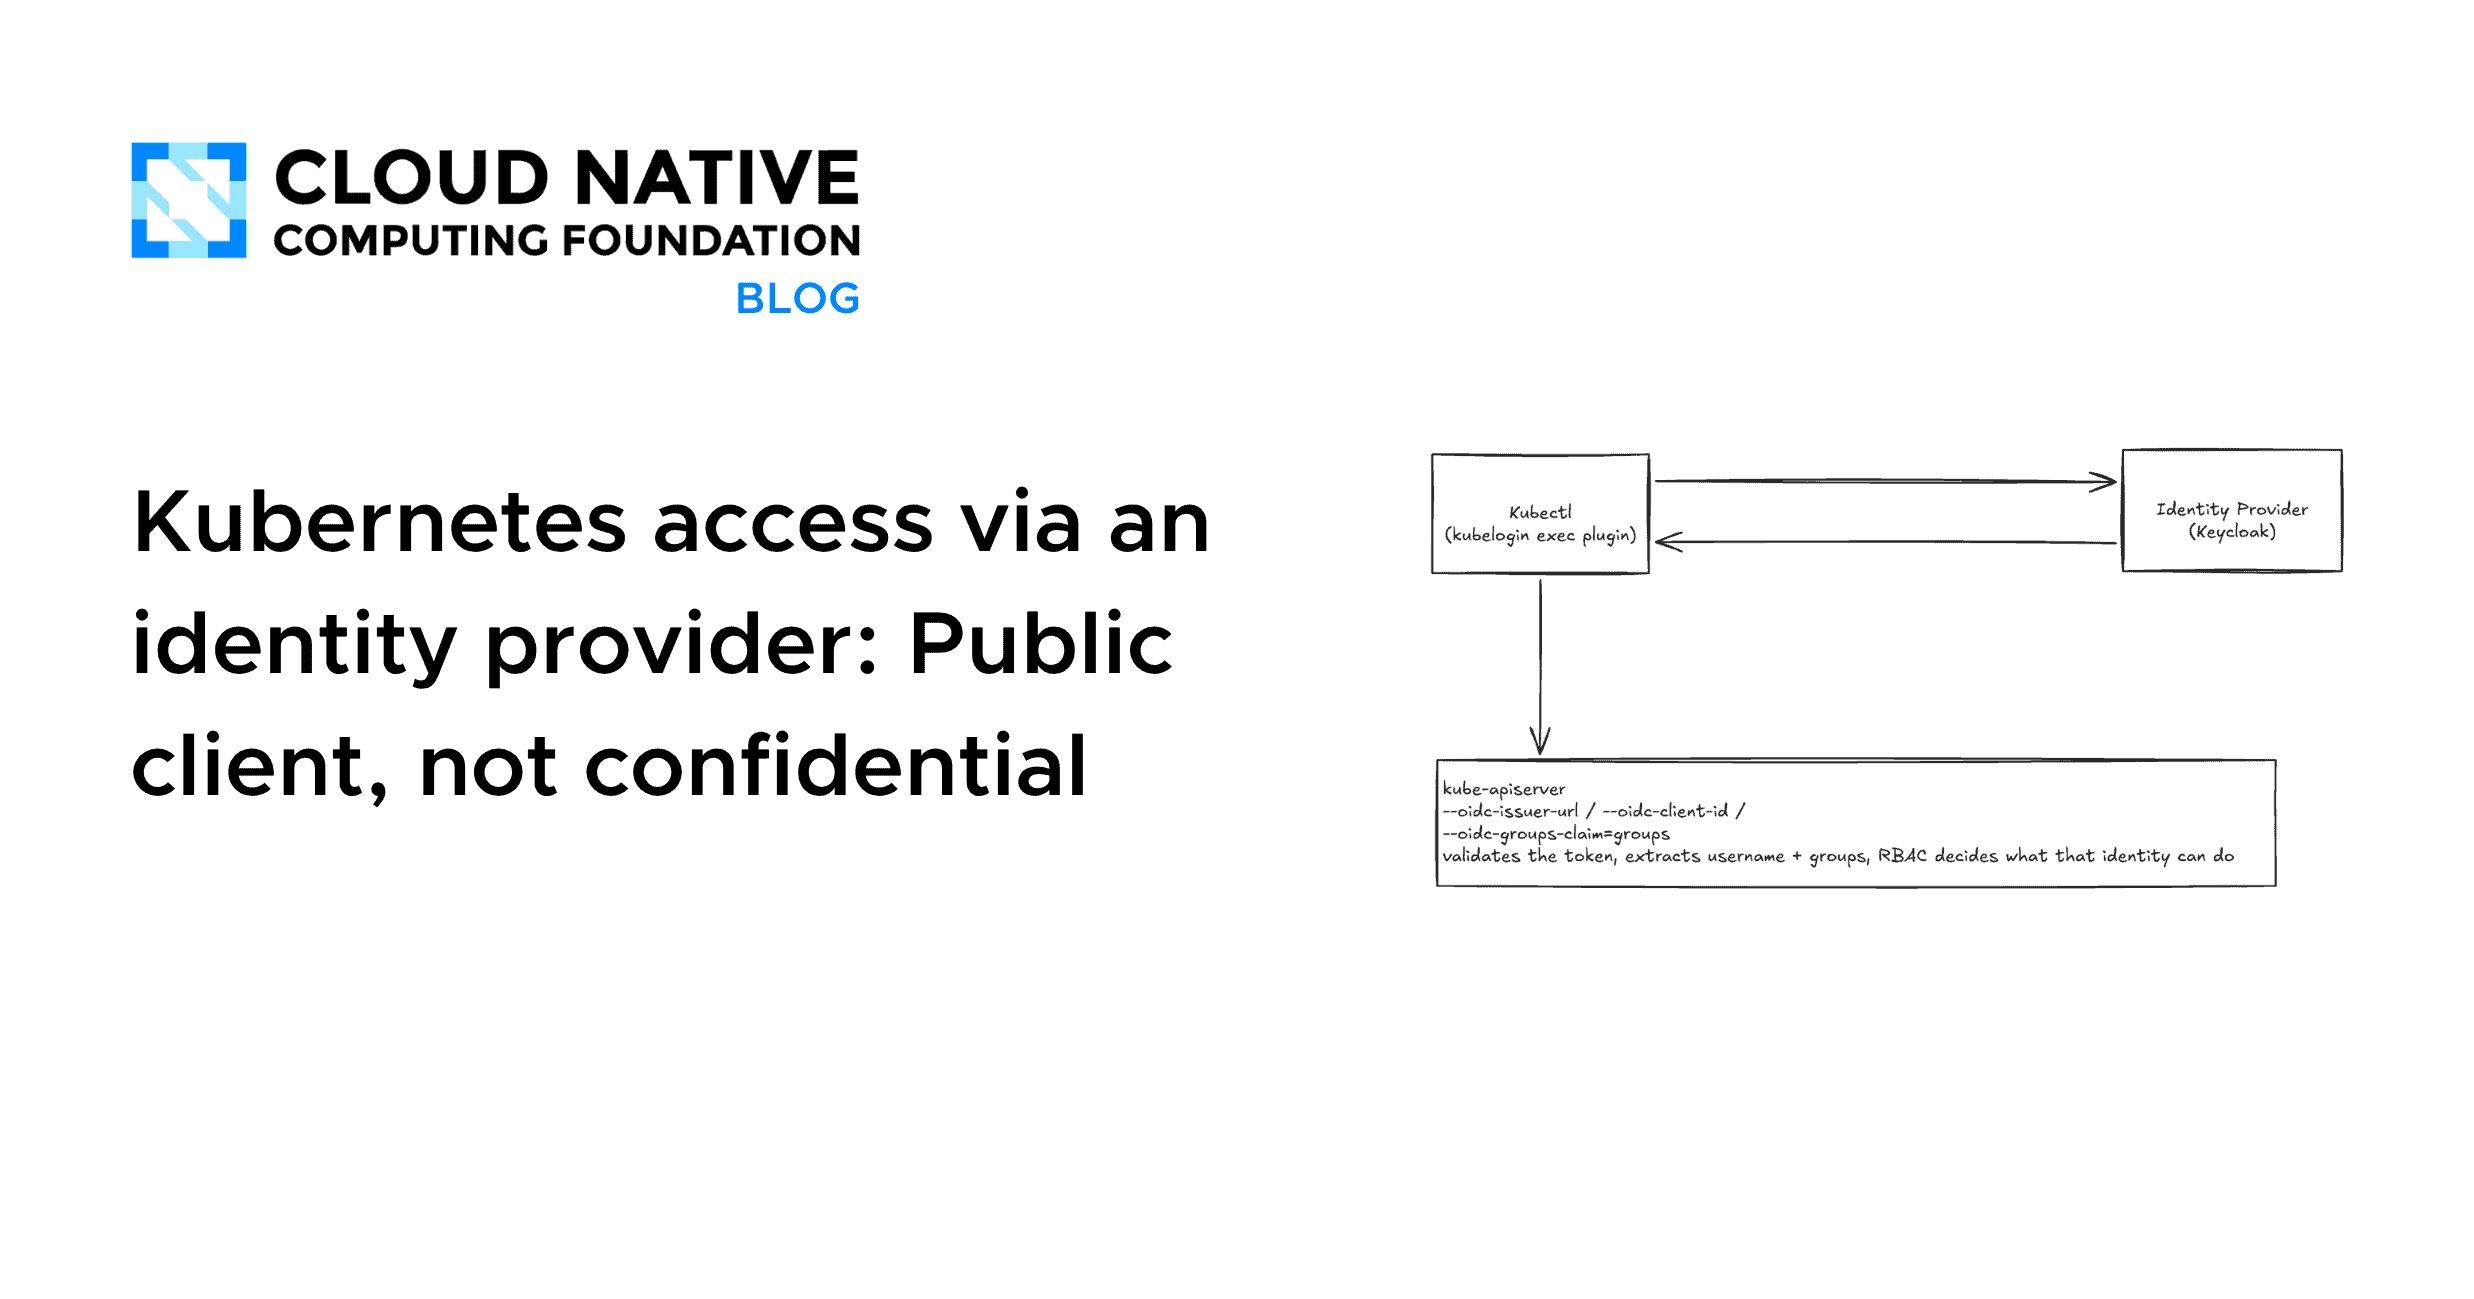
The architecture rests on three components that must agree with one another:
1. **kubectl with the kubelogin exec plugin** — initiates the browser-based login against the identity provider, receives an ID token, and attaches it as a bearer credential to every API request.
2. **The identity provider itself** — authenticates the user and issues an ID token containing their username and group membership claims.
3. **kube-apiserver** — configured with OIDC issuer URL, client ID, and the groups claim name. It validates the token against the provider’s public signing keys, extracts the identity and group assertions, and hands the request off to RBAC for authorization decisions.
The API server validates the token directly using the IdP’s public keys. It does not need persistent network connectivity to the identity provider beyond an initial fetch of those keys. The kubectl process itself never contacts the API server first; the exec-credential plugin intercepts the request, drives the browser login flow, and returns the resulting token to kubectl.
—
## The Client Configuration Decision That Defines Security
When registering your Kubernetes client with the identity provider, you face a critical choice: public or confidential client.
A confidential client issues a client secret. That secret then gets copied into the kubelogin plugin configuration and shipped to every machine that needs cluster access. A credential distributed to every client consuming it has ceased to function as a secret. It becomes a shared static credential with extra steps, and rotating it demands a coordinated configuration push to every machine — not simply disabling one compromised identity.
The modern approach is straightforward: make the client public. Issue no secret at all. Use the Proof Key for Code Exchange (PKCE) extension instead. PKCE protects the authorization code flow by having the client generate a random value locally, send a cryptographic hash of it with the initial login request, and then prove possession of the original value when exchanging the code for a token. An interceptor who captures only the code cannot complete the proof without the original random value.
In the identity provider’s admin console, the client configuration looks like this:
– **Client ID:** `kubernetes`
– **Client authentication:** Off (public client, no secret issued)
– **Standard flow:** On
– **Direct access grants:** Off
– **Require PKCE:** On, method S256
– **Valid redirect URIs:** Loopback addresses only (no external URIs)
– **Web origins:** Loopback addresses only
– **Client scopes:** `openid`, `profile`, `email`, `groups`
This setup aligns with OAuth 2.1 guidance for native and command-line applications, eliminating shared secrets from the equation entirely.
—
## Step-by-Step Implementation
### Step 1: Map Group Membership into the ID Token
Kubernetes does not treat users as first-class objects. RBAC binds permissions to usernames and groups asserted by the token. For this to work, the identity provider must embed group membership into the ID token.
In the identity provider, add a protocol mapper of type “Group Membership” to the client scope. Map it to the claim name `groups` and ensure it is added to the ID token. This single mapper is what bridges group management in the identity provider to RBAC bindings in the cluster.
### Step 2: Configure the API Server to Trust the Issuer
Point the API server at the identity provider using these startup flags:
“`
–oidc-issuer-url=https://
–oidc-client-id=kubernetes
–oidc-username-claim=preferred_username
–oidc-groups-claim=groups
“`
If the identity provider’s certificate is not signed by a publicly trusted certificate authority — the common scenario for a self-hosted on-prem provider — add one additional flag:
“`
–oidc-ca-file=/etc/kubernetes/pki/oidc-ca.crt
“`
Without this, the API server fails TLS verification when fetching the issuer’s signing keys, producing an error unrelated to the login flow itself. This is one of the more confusing issues to diagnose on a first encounter.
### Step 3: Replace Static Credentials in kubeconfig
Instead of embedding certificates or static tokens, configure kubeconfig with an exec-credential entry:
“`yaml
users:
– name: oidc
user:
exec:
apiVersion: client.authentication.k8s.io/v1
command: kubectl
args:
– oidc-login
– get-token
– –oidc-issuer-url=https://
– –oidc-client-id=kubernetes
“`
Notice there is no `token` or `client-key` field. There is nothing to put there, and that is the point. The credential is derived dynamically from the identity provider on each request.
### Step 4: Bind Groups to Kubernetes RBAC
Create role bindings that reference groups rather than individual users:
“`yaml
apiVersion: rbac.authorization.k8s.io/v1
kind: ClusterRoleBinding
metadata:
name: platform-viewers
subjects:
– kind: Group
name: platform-viewer
apiGroup: rbac.authorization.k8s.io
roleRef:
kind: ClusterRole
name: view
apiGroup: rbac.authorization.k8s.io
“`
This binding means any identity carrying the `platform-viewer` group in their token receives view-level cluster access. When you need to change permissions, you modify group membership in the identity provider. The next token minted reflects the change, and the RBAC binding applies immediately. No cluster-side configuration change, no kubeconfig redistribution.
—
## What Day-to-Day Usage Looks Like
The first time a user runs a kubectl command with this setup, kubelogin opens a browser window pointing to the identity provider’s login page. After authentication, the plugin receives an ID token, caches it locally, and uses it for subsequent requests until it expires. When the token does expire, kubelogin silently uses a refresh token to obtain a new one — no browser round-trip required.
A first login appears as:
“`
$ kubectl get pods
Opening in existing browser session.
NAME READY STATUS RESTARTS AGE
web-7f9c9c4d8-2xk9p 1/1 Running 0 3d
“`
To verify exactly which identity and groups landed in the token:
“`
$ kubectl auth whoami
ATTRIBUTE VALUE
Username jane.doe@example.com
Groups [platform-viewer system:authenticated]
“`
—
## The Deeper Payoff: A Meaningful Audit Trail
Beyond access management, this architecture transforms the cluster’s audit trail. Kubernetes logs every request that reaches the API server, but those logs are only as valuable as the identity attached to each entry. When everyone authenticates with a shared kubeconfig that presents a generic identity — often `cluster-admin` — the audit log shows the same entity for every action regardless of who actually executed the command. It becomes a list of anonymous operations.
Federation through an OIDC provider ensures every API server request carries the actual person who made it. The audit trail becomes a genuine record of who did what. For compliance, incident response, and operational accountability, this distinction is immense — and it costs a fraction of what most teams assume to implement.
—
## FAQ
**Q: Does this require reworking how the Kubernetes cluster runs?**
A: No. This is an authentication-layer addition. The cluster itself continues to operate unchanged. You are adding a public OIDC client, a group membership mapper, a handful of RBAC bindings, and a kubectl plugin — all of which are well-supported and commonly available.
**Q: What happens if the identity provider goes offline?**
A: Existing cached tokens continue to work until they expire. kubelogin will fail to obtain a new token when the current one expires and no refresh is possible. Planning for IdP high availability is a separate infrastructure concern, but the cluster does not depend on a live connection to the IdP for each individual API request.
**Q: Can I use any OIDC-compliant provider, or is Keycloak required?**
A: Keycloak is used as the reference example throughout this article, but any OIDC-compliant identity provider that supports group claims and PKCE will work. The kube-apiserver configuration flags and kubelogin plugin are provider-agnostic as long as the token format and claims align.
**Q: Is PKCE strictly necessary if I am already using HTTPS?**
A: Yes. PKCE protects against authorization code interception attacks, which are possible even over encrypted connections if an attacker can observe or manipulate the redirect. Using PKCE with a public client eliminates the need for a client secret and closes a significant class of OAuth attacks. OAuth 2.1 mandates PKCE for native and command-line applications for this reason.
**Q: How do I handle service accounts or automated processes that need cluster access?**
A: This pattern is designed for human users authenticating through the identity provider. Service accounts should continue to use their native Kubernetes service account tokens or dedicated machine identities. The OIDC integration and RBAC group bindings handle human access; automated processes have a separate, well-understood path.
**Q: What if I need to support multiple clusters with the same identity provider?**
A: The same OIDC client configuration works across clusters. Each cluster’s API server is configured with the same issuer URL and client ID, and RBAC bindings are defined per-cluster. Users authenticate once against the identity provider and receive tokens valid for any cluster that trusts that issuer.
—
## Conclusion
Integrating an identity provider with a self-hosted Kubernetes cluster is not a platform migration. It is a single-afternoon configuration task that replaces fragile static certificates with a dynamic, group-based access model. The setup involves a public OIDC client, a group membership mapper, a few API server flags, exec-credential kubeconfig entries, and standard RBAC bindings.
The result is access that follows identity and group membership rather than files scattered across machines. Revocation becomes a group change. Onboarding becomes an IdP operation. The audit trail gains meaningful identity context. And the entire cluster’s security posture improves without touching how it actually runs.
For anyone managing a self-hosted Kubernetes cluster today, this should be on the same day-zero checklist as networking and storage. It was never optional — it was just overlooked.
Thank you for reading
